
How to Set Print Area in Excel
In today’s digital era, Excel has emerged as an indispensable tool for businesses, students, and professionals. Nevertheless, there are moments when you need to transform your digital data into a tangible form, such as a printed spreadsheet. To achieve this, it’s crucial to learn how to set print area in Excel. In this article, we will walk you through the process, step by step, to help you easily achieve precise printing of your Excel sheets. So, let’s begin with Excel
Understanding the Basics
What is the Print Area?
In Excel, the print area is a designated portion of your worksheet that you want to print. By defining the print area, you can avoid wasting paper and ink by excluding unnecessary content.
set print area
Steps to Set Print Area
Step 1: Opening Excel
- Launch Microsoft Excel: Begin by launching Microsoft Excel on your computer. If it’s not already installed, you can download it from the official website.

Step 2: Creating Your Spreadsheet
- Create Your Spreadsheet: If you haven’t already, input your data and create the spreadsheet that you want to print. Ensure that your data is organized and formatted as needed.

Step 3: Selecting the Print Area
- Select Your Data: Achieve this by clicking and dragging your mouse across the cells you want to select.

Step 4: Setting the Print Area
- Navigate to the Page Layout Tab: Go to the “Page Layout” tab in the Excel ribbon.

Step 5: Defining the Print Area
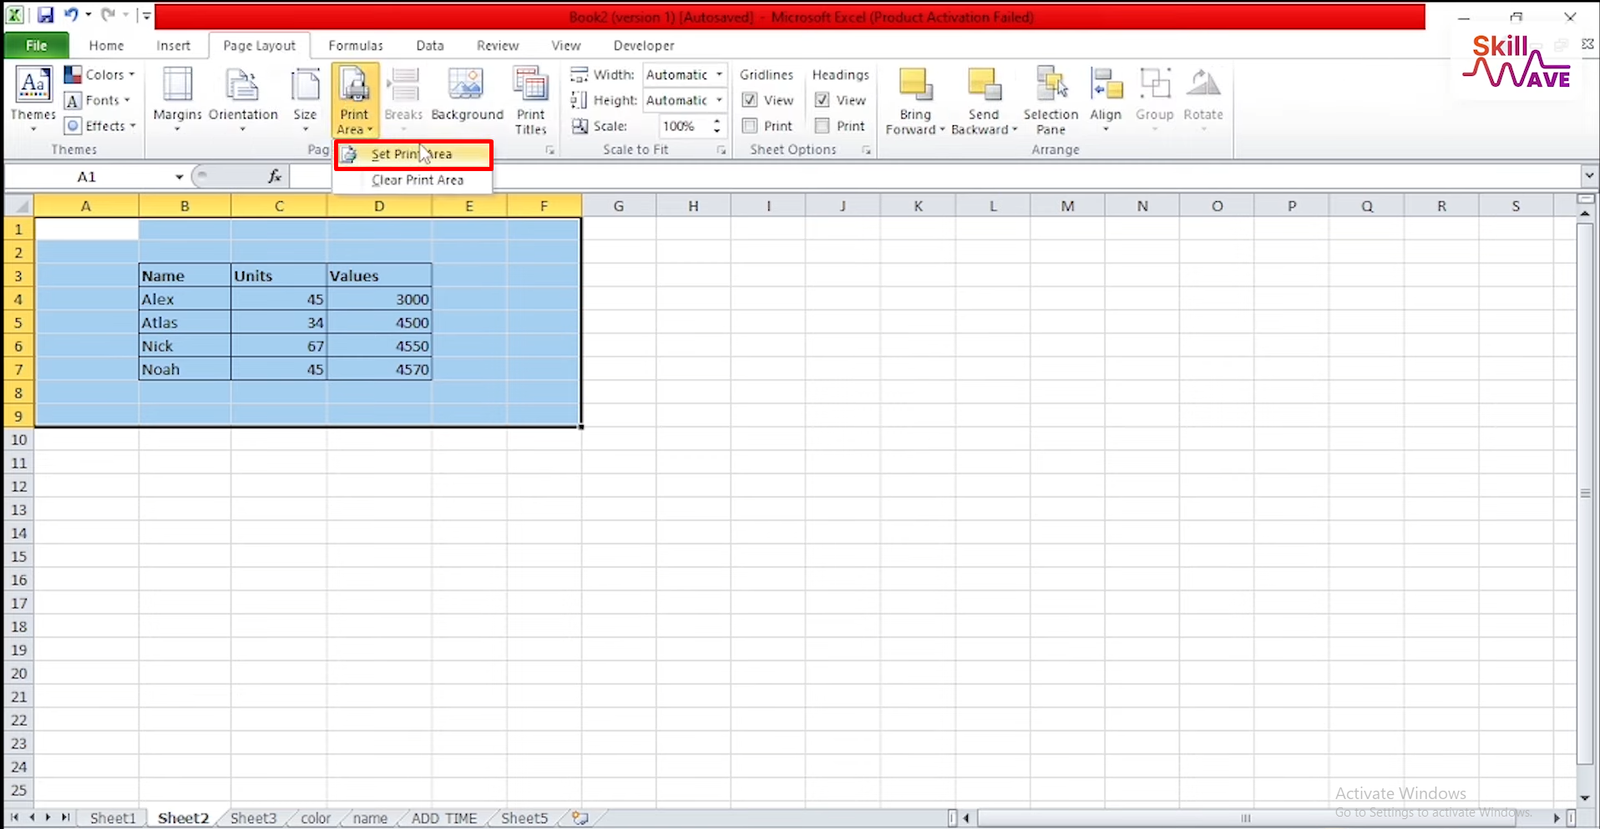
- Click on Print Area: Find the “Print Area” button and click on it. A dropdown menu will appear.

Step 6: Selecting “Set Print Area”
- Choose “Set Print Area”: In the dropdown menu, click on “Set Print Area.” This action will define the selected cells as the area to be printed.

Step 7: Previewing the Print Area
- Preview Your Print Area: To check if you’ve set the print area correctly, click on the “Print Preview” button. This will show you how your printed spreadsheet will appear.

Step 8: Adjusting Page Layout (Optional)
- Fine-Tune Page Layout: If needed, you can make additional adjustments to the print area by modifying page margins, orientation, and scaling under the ‘Page Layout’ tab.

Step 9: Printing Your Spreadsheet
- To print your spreadsheet, simply click the “Print” button once you’re content with the print area and layout.

Watch the video tutorial if you didn’t understand the instructions above.
Conclusion
In this article, we’ve explored the essential steps for setting the print area in Excel. This skill will help you customize your printouts, saving time, resources, and ensuring that your printed documents look professional and well-organized. No matter if you’re creating reports, budgets, or any other kind of spreadsheet, the skill of managing your print area is highly valuable.
Now, let’s tackle some frequently asked questions to deepen your comprehension.
FAQs
1. Can I set multiple print areas on a single worksheet?
- Yes, you can define multiple print areas within a single worksheet. This can be useful if you want to print different sections separately.
2. How can I clear the print area if I change my mind?
- To clear the print area, navigate to the “Page Layout” tab, click on “Print Area,” and select “Clear Print Area.”
3. What if my print area exceeds one page?
- If your print area spans multiple pages, Excel will automatically paginate the content. You can adjust page layout settings to control how it’s split.
4. Can I set the print area for non-contiguous cells?
- Indeed, you can select non-contiguous cells by holding down the “Ctrl” key while choosing them. Then, go ahead and set the print area as you typically would.
5. Is there a way to save my print area settings for future use?
- Unfortunately, Excel does not provide a built-in feature to save print area settings. You’ll need to define the print area each time you print.
With your newfound ability to set the print area in Excel, you’ll be able to streamline and improve your spreadsheet printing activities. Enjoy the convenience and professionalism that this skill brings to your Excel experience.